
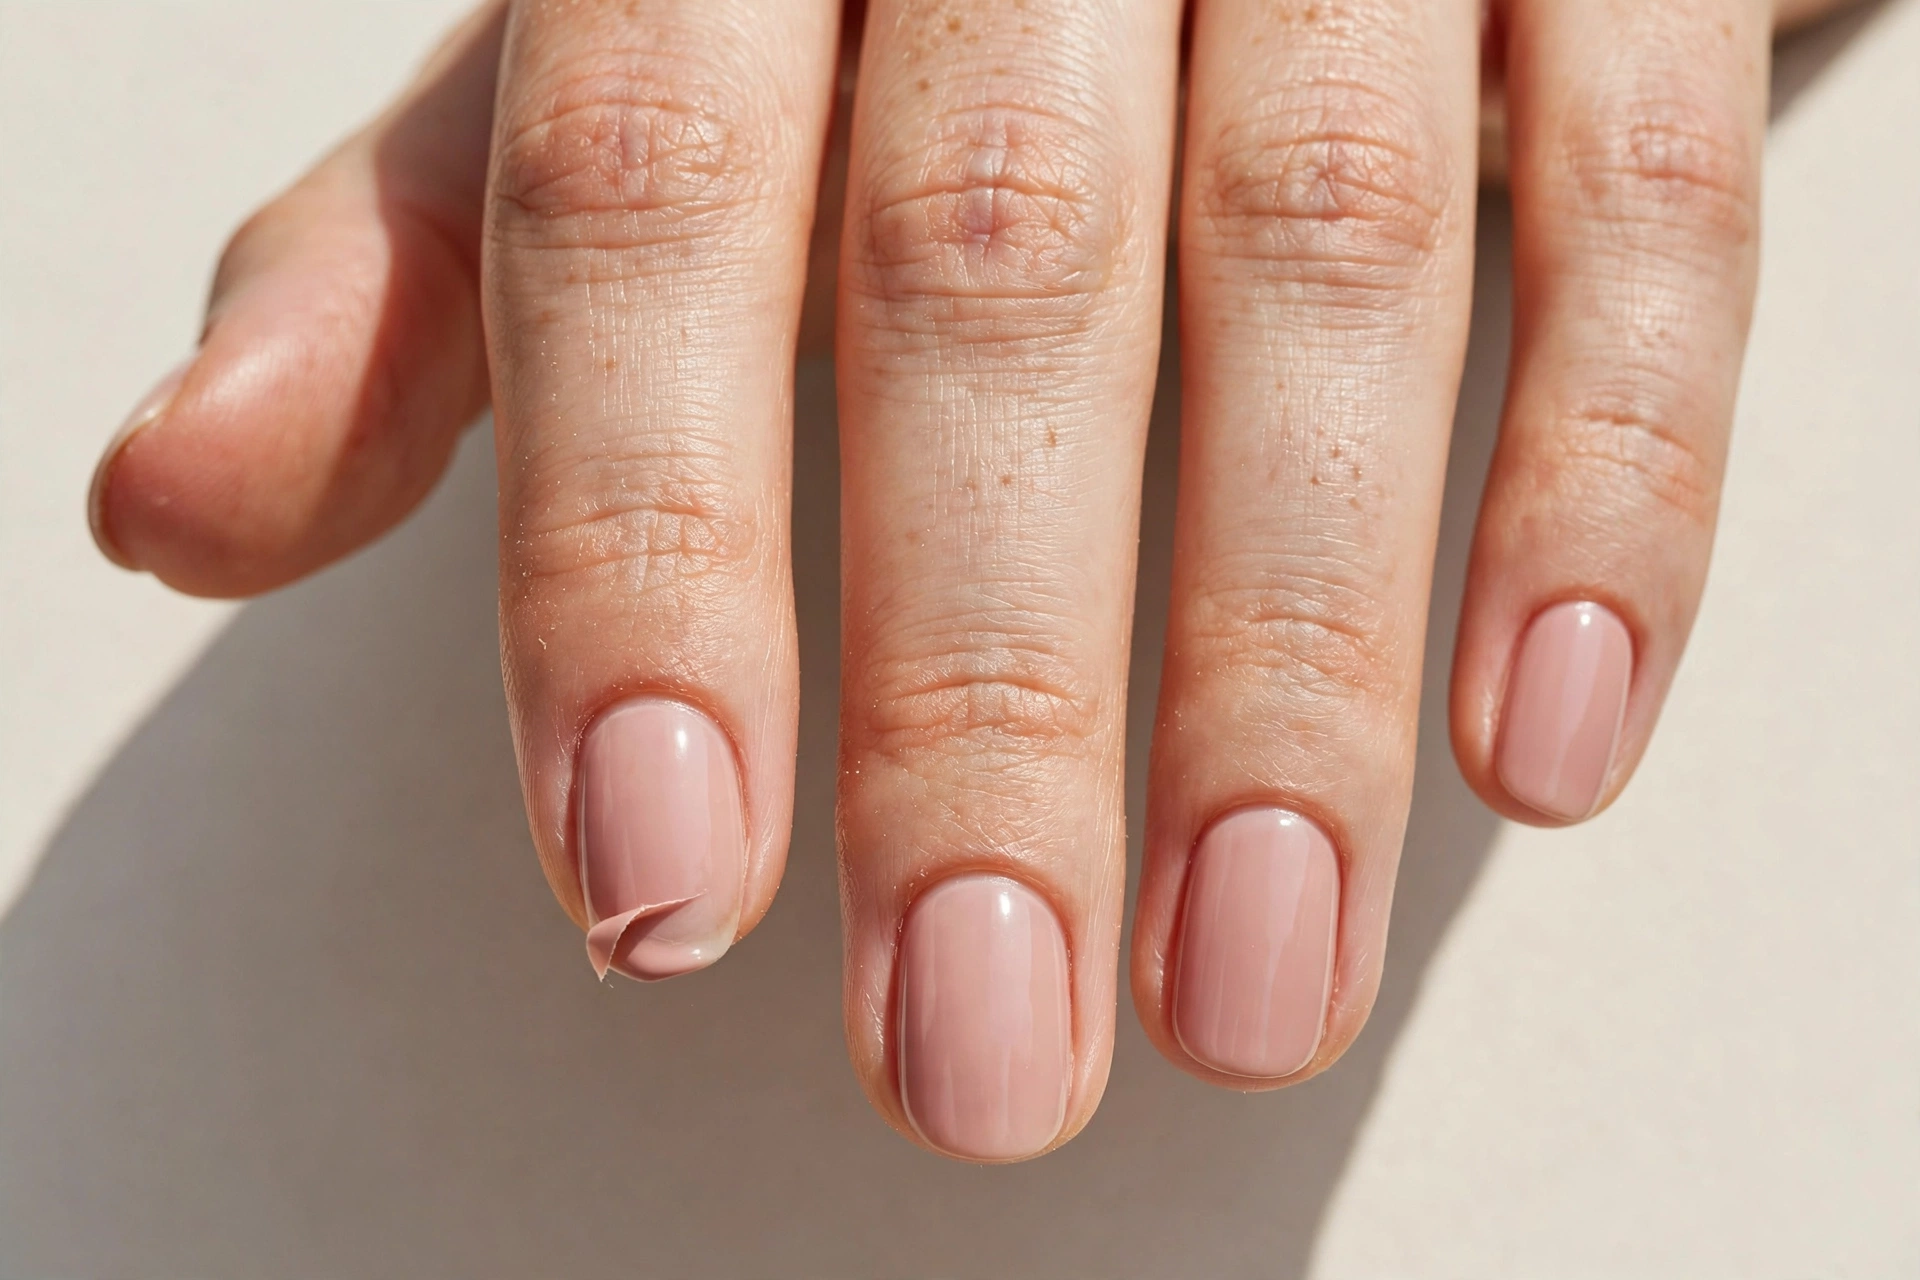
Gel polish should stay put for a couple of weeks, so peeling in a few days feels frustrating. It is also useful information. Where the polish lifts tells you what went wrong, and the fix depends on that pattern. A lift at the cuticle usually points to a different problem from a lift at the tip, and a whole sheet coming off points to another problem again.
This guide helps you diagnose the pattern, fix the cause, and decide whether you need a salon visit, a better DIY routine, or a short break from gel. It is a peeling diagnosis page. It is not a full removal guide and it is not a post acrylic recovery plan. For those, use the linked guides below.
The short answer: peeling is a prep, curing, or damage problem
Most gel polish peeling comes from one of three causes. First, prep mistakes leave oil, moisture, or loose cuticle on the nail, so the base coat cannot grip. Second, curing mistakes leave a coat soft, too thick, or uncured at the edges, so it lifts once it meets water or daily wear. Third, the nail plate itself is weak, thin, or damaged, so even a well applied coat has nothing solid to hold on to.
Peeling is rarely about one bad bottle of polish alone. If only one nail peels, look at that nail first. If every nail peels in the same place, look at your routine first. If peeling starts after damage, look at the health of the nail before you blame the product.
Direct answer in brief: if gel polish lifts at the cuticle, check cuticle prep and flooding. If it lifts at the free edge, check capping, thickness, and wear. If a whole sheet peels off, check dehydration, base coat grip, and curing. If the nail underneath is thin, peeling, or sore, protect the nail first and give gel a break.
Diagnose it by peeling pattern
Before you change products, look closely at where the lift starts. This one step saves you from fixing the wrong problem.
Cuticle lift
The polish pulls away near the skin at the base of the nail. The edge may catch on hair or fabric. Cuticle lift often follows polish touching the skin, cuticle left on the nail plate, or oil left behind after prep. It can also follow a base coat that was applied too thickly near the cuticle.
Free edge lift
The polish chips or lifts at the tip first. The rest of the nail may still look fine. Free edge lift often follows a missed cap, thick coats, or heavy use of the fingertips. It is common on longer nails, on nails used as tools, and on nails exposed to a lot of water.
Whole sheet peel
A large piece comes off in one sheet, sometimes with little effort. The underside may look smooth. Whole sheet peel often points to a grip problem across the whole nail. That can mean the nail was not dehydrated, the base coat did not bond, the lamp did not cure the coat fully, or the nail surface was too smooth or too oily.
Peeling with cracks, splits, or soreness underneath
This pattern is different. The problem may be the nail, not the polish. If the natural nail is splitting into layers, bending easily, or feeling sore, a new coat will not fix it. It will only hide the weak nail for a few days, then lift again. In that case, follow the damage section below before you reapply.
| Peeling pattern | Most likely cause | First fix to try |
|---|---|---|
| Cuticle lift | Cuticle on the plate, polish on skin, or oil left after prep | Cleaner cuticle prep and a thinner base coat kept off the skin |
| Free edge lift | No cap, thick coats, or heavy fingertip wear | Cap the free edge, use thinner coats, and shorten the nail slightly |
| Whole sheet peel | Poor grip, incomplete curing, or a very oily or smooth nail | Dehydrate properly, check lamp curing, and apply a thin base coat |
| Peel plus split or sore nail | Weak or damaged nail plate | Short break, oil, and protection until new growth is stronger |
Causes: prep mistakes (cuticle, oils, dehydration)
Prep is the quiet part of a gel manicure, and it decides most of the result. Gel needs a clean, dry, slightly roughened nail to grip. Anything between the base coat and the nail weakens that grip.
Cuticle left on the nail plate is a common cause. The thin, almost invisible skin that sticks to the nail near the cuticle is not the same as the visible cuticle you push back. If it stays on the plate, polish sits on skin, not on nail, and it lifts as that skin dries and moves. Push cuticles back gently and remove only the loose, lifted material. Never cut living skin. If you are unsure, a salon technician can show you the difference in one visit.
Oil is the next common cause. Hand cream, cuticle oil, and even natural skin oil can sit on the nail after washing. Wash hands, then wipe each nail with a lint free wipe and a nail dehydrator or cleanser made for gel prep. Let the nail dry fully before the base coat. Do not apply cuticle oil until the manicure is finished and cured.
Over buffing and under buffing both cause problems. A nail that is left very shiny and smooth gives the base coat little to grip. A nail that is filed too hard becomes thin and flexible, so the polish bends and lifts with it. Use a gentle buffer to remove shine only. Stop as soon as the surface looks matte. Do not file the natural nail with a coarse file.
Water before application also matters. A long bath, a soak, or washing up just before a manicure leaves the nail swollen with water. As it dries, it shrinks slightly, and the polish can lift. Keep nails dry before application, and avoid soaking the hands in water just before you start.
Causes: curing mistakes (lamp, thickness, capping the free edge)
Gel polish hardens under a lamp. If a coat is not cured fully, it stays soft underneath and lifts easily, even if the surface feels dry. This is one of the most frustrating causes, because the manicure can look perfect on day one.
Thick coats are a frequent cause. Thick colour coats cure on the surface but stay soft in the middle. They also shrink and pull as they cure, which can lift the edges. Apply thin coats. Two thin colour coats give better colour and better wear than one thick coat. Wipe the brush well, and keep each coat even.
Lamp problems are also common. A lamp that is old, weak, or the wrong type for your polish may not cure each coat fully. Check that your polish and lamp are meant to work together. For the difference between lamp types, see our guide to UV vs LED nail lamps. Cure for the full time your polish brand states. Do not rush the final top coat.
Placement in the lamp matters too. A thumb or a finger that sits at an angle may not get full light on every edge. Place the hand flat, keep fingers slightly apart, and cure thumbs separately if needed. If a nail always peels on the same side, check how that hand sits in the lamp.
Capping the free edge is a small step with a large effect. After each coat, run the brush lightly across the very tip of the nail to seal the edge. This protects the most exposed part of the manicure. Skipping the cap leaves an open edge where water and daily wear can start a lift. Keep the cap thin. A thick blob at the tip will chip instead of sealing.
Flooding the cuticle or sidewalls also weakens wear. Polish that touches skin will lift as the skin moves, and it can pull the rest of the coat with it. Wipe any polish off the skin with a clean brush or an orange stick before curing. Never cure polish that is sitting on skin.
Causes: peeling after nail damage (when the nail plate itself is the problem)
Sometimes the routine is fine and the nail is the problem. A thin, peeling, or damaged nail plate bends more than a healthy nail. Gel is rigid, so it cannot bend with a very flexible nail. The bond breaks, usually at the free edge first.
Damage can follow rough removal, over filing, back to back enhancements with no break, or a long period of picking at polish. Picking is especially damaging. Pulling gel off lifts thin layers of the natural nail with it. The next set then has a weaker surface to grip, so it peels sooner, which tempts you to pick again. Breaking that cycle matters more than changing brands.
If your nails are peeling into layers, splitting at the sides, or feeling sore after removal, do not cover them with a new gel set straight away. Our guide to how to repair damaged nails after acrylics covers the same recovery principles for weak nails, including short length, daily oil, and a flexible strengthener. The principles apply even if your damage came from gel rather than acrylics.
Watch for signs that need a professional check rather than a cosmetic fix. See your GP or a podiatrist promptly if a nail is lifting away from the nail bed, if there is swelling, spreading redness, warmth, or pus around a nail, if discolouration is dark or does not grow out, or if pain is severe or getting worse. Do not cover those signs with polish or an enhancement. This article does not diagnose nail disease, and a quick professional check is safer than guessing.
Fix per pattern: what to do for each type of peel
Use the pattern you diagnosed above, then change only that part of your routine first. Changing everything at once makes it hard to know what worked.
Fix for cuticle lift
- Push cuticles back gently after a shower or a warm hand wash, when skin is soft.
- Remove only loose material from the nail plate. Do not cut living skin.
- Wipe each nail clean and let it dry fully.
- Apply a thin base coat and keep it off the skin and cuticle.
- Cure fully before the next coat.
Fix for free edge lift
- Shorten nails slightly until wear improves. Shorter nails take less leverage.
- File the free edge smooth so it cannot catch.
- Apply thin coats and cap the free edge with each coat, including the top coat.
- Wear gloves for washing up, cleaning, and long wet work.
- Stop using fingertips as tools to open cans, peel labels, or scrape surfaces.
Fix for whole sheet peel
- Check your prep: clean, dry, matte nail, with no oil or cream before the base coat.
- Apply one thin base coat and cure for the full stated time.
- Check lamp placement and lamp type for your polish brand.
- Use thin colour coats and cure each one fully.
- If peeling still happens on every nail, try a different base coat before you change your colour polish. Base coat grip varies more than people expect.
Fix for a damaged nail underneath
- Remove gel safely. Do not peel or prise it off. For safe removal steps, see our guide to safe gel and acrylic removal.
- Trim nails short and file gently in one direction.
- Use cuticle oil daily and hand cream after washing.
- Use a flexible strengthener if your nails are bendy, rather than a very hard one that can snap.
- Wait until new growth near the cuticle looks stronger before your next gel set.
If a single nail keeps peeling after you have fixed prep and curing, look at that nail alone. It may be shorter, more curved, more damaged, or used more heavily than the others. A slightly shorter length or a different shape on that one nail often solves a problem that a product change will not.
UK salon vs DIY: how to tell which one you need
Both salon and DIY gel can last well. The right choice depends on the cause of your peeling and on how much help your nails need.
A salon visit is the better choice if peeling follows damage, if you cannot tell where the lift starts, if your cuticles bleed or hurt during prep, or if you have signs that need a professional check. A good technician can assess the nail, adjust prep for your nail type, and tell you honestly if a break would help more than a new set. Ask how they prep, how they remove gel, and whether they cap the free edge. Their answers tell you a lot about their care.
DIY works well if your nails are healthy, your peeling has a clear pattern, and you are willing to slow down on prep and curing. The most common DIY mistake is rushing. Thin coats, full cure times, and a clean, dry nail take longer, but they are the difference between a set that lasts days and a set that lasts weeks.
Price alone is a poor guide. A cheap salon set that is removed roughly can cost more in nail damage than a careful DIY routine. A careful salon set with safe removal can be worth it if your nails are weak or if you want length that DIY application struggles to support. Judge by removal method and nail health after the set, not only by how the set looks on day one.
If you use a salon, do not peel gel off between visits to make removal easier. Peeling damages the nail and makes the next set peel sooner. Book a proper removal, or follow a safe soak off routine at home if your salon advises it.
When peeling signals a break from gel (and what to do instead)
Peeling is sometimes your nails asking for a pause. Take a break if peeling keeps happening even after prep and curing are fixed, if nails are thin, splitting, or sore, if the free edge breaks easily, or if you are picking at lifts and making damage worse. A break is not a failure. It is how a weak nail grows out stronger.
During a break, keep nails short, use oil daily, wear gloves for wet work, and use a flexible strengthener if it helps. You can still use regular polish if your nails feel comfortable, because regular polish is easier to remove and puts less stress on the nail than a hard gel coat. Skip enhancements, extensions, and builder products until the new growth feels stronger.
How long should a break last? There is no single answer, because nails grow slowly and damage grows out from the base. Many people notice a real difference in a few weeks, when the weakest tip has been trimmed away and new growth near the cuticle looks smoother. Judge by the nail, not by the calendar. When the nail no longer bends painfully, splits at the slightest catch, or peels in layers, it is ready for a careful gel set again.
If you are unsure, ask a nail technician or a podiatrist to look at your nails. They can tell whether the problem is surface damage, a shape issue, or something that needs medical advice. Do not use a builder product to hide a nail that is sore, lifting, or discoloured.
Prevention: the routine that stops peeling coming back
Prevention is mostly a short routine, repeated the same way each time. It works because it removes the causes before they start.
- Keep nails at a length your lifestyle supports. Shorter nails peel less.
- Prep on clean, dry nails. No cream or oil before the base coat.
- Push cuticles back gently. Keep polish off the skin.
- Buff only to remove shine. Do not thin the nail.
- Apply thin coats. Cure each coat fully, including the top coat.
- Cap the free edge with every coat.
- Wear gloves for washing up and cleaning.
- Apply cuticle oil daily after the manicure is cured, and hand cream after washing.
- Remove gel safely. Never peel it off.
- Take a break if peeling, splitting, or soreness keeps returning.
Daily habits matter as much as application. Water softens nails, so long soaks, frequent hand washing without gloves, and harsh cleaning products all shorten wear. Heat can also soften gel soon after curing, so avoid very hot water, saunas, and long baths on the day of application if you can.
Store polish correctly too. Keep bottles closed, away from heat and sunlight, and wipe the neck clean so the cap seals. Old, thickened polish applies unevenly and cures less reliably. If a polish has gone thick and stringy, it is better to replace it than to fight with thick coats.
Frequently asked questions
Why does my gel polish peel off after only a few days?
Early peeling usually points to prep or curing, not to the colour itself. Check for oil or cuticle on the nail, thick coats, an uncapped free edge, or a lamp cure that was too short. If only one nail peels, check that nail for damage or heavy use.
Can I fix a small lift without removing the whole manicure?
A tiny lift at the tip can sometimes be sealed with a thin top coat and a full cure, but only if the nail underneath is healthy and the lift is small. If the lift is near the cuticle, if water has got underneath, or if the nail is sore, remove the set safely instead. Sealing over trapped moisture can make lifting worse.
Does cheap gel polish peel more?
Price is not the only factor. A well applied, well cured polish from a mid range brand often outlasts an expensive polish applied thickly or cured poorly. Base coat grip, lamp match, and prep matter more than the colour brand alone. If you change brands, change one product at a time so you can see what helped.
Is peeling a sign that gel is damaging my nails?
Not always. Peeling from prep or curing does not automatically mean damage. Peeling that follows picking, rough removal, or a thin and sore nail is different. If your natural nails are getting thinner, more bendy, or more painful over time, take a break and let them recover before your next set.
Should I use BIAB instead of gel polish if my polish keeps peeling?
BIAB, which is builder gel in a bottle, can add strength and help some weak nails grow, but it is not a fix for poor prep or poor curing. It also needs safe removal, like any enhancement. If your nail is damaged, a break and a recovery routine help more than a stronger coating. For what BIAB is and how it differs from gel polish, see our guide to BIAB builder gel.
When should I see a professional about peeling?
See a nail technician if peeling keeps happening after you have fixed prep, thickness, capping, and curing. See your GP or a podiatrist if a nail is lifting, painful, swollen, discoloured, or not improving. Do not cover those signs with a new set.
Conclusion
Gel polish peeling is annoying, but it is also a clear signal. Find the pattern first, then fix that cause. Clean, dry prep, thin coats, a full cure, and a sealed free edge solve most cases. If the nail underneath is weak, protect it first and take a break. When you return to gel with a stronger nail and a slower routine, your manicure has a much better chance of lasting.
For more nail care in this cluster, browse the Nail Care and Nail Art category, including the repair and removal guides linked above.